Portainer
Use a Docker Standalone environment in Portainer. This recipe runs the app on that Docker host, which may be a different machine from the Portainer server. The interface steps follow Portainer's stack documentation.
A recent Portainer CE on Docker Standalone (Apple Silicon host) passes the Web editor stack deployment, app readiness, and the browser Console commands below. This hasn't been checked against a remote NAS tunnel or a published-release download; see the deployment matrix for exact coverage.
1. Create the stack
Open Stacks → Add stack, name it immich-memories, and select Web editor. Enter your connection details below, then copy the generated docker-compose.yml into the editor. No .env upload is needed.
Setup files for docs build v1.0.0-rc.1. The app image and release assets use this same version.
Create a key with the ten required read permissions. Add the five upload permissions only to send films back; asset.delete is optional. Avoid the All preset.
Can I run this? Check the version and topology matrix.
Not yet tested as an end-to-end generated installation on Linux Docker Compose. Files are checked with Compose/Kustomize and the form is checked in a browser. Those checks do not run this installation. Earlier NAS, Mac and GPU Kubernetes checks are recorded in the measured results. Tried it? Report your platform, release and preflight result.
Your choices produce files in this browser. Nothing is sent to an Immich or model server.
Enter your Immich API key.
Keep Single file for a stack editor selected. Enter the Immich address your container can reach and its API key. The generated file includes a private Settings encryption key; keep the download with your backups. No .env file or hand-written YAML is needed.
The default Basic setup needs no separate model service. Set your home, people and optional service URLs in Settings. The config and output volumes keep settings, cached facts and films across container replacement. Download films through the app or enable upload-back. Include both volumes and the encryption key in your backups.
To keep films in a NAS share instead, replace the generated output volume mount with an absolute host path after creating that folder and giving UID/GID 1000 write access. See NAS folder permissions. That storage change is optional; the generated file works with its named volumes.
2. Deploy
Click Deploy the stack. Wait for immich-memories to be running. If the host already uses port 8080, change the left-hand port in the mapping, keeping 127.0.0.1.
title_screens.locale: auto follows the host's LANG, but the container sets none, so a film
always renders in English until you set title_screens.locale: fr (or add LANG: fr_FR.UTF-8
to the stack's environment) for a French one.
3. Prepare and check
Open Containers → immich-memories → Console, connect with /bin/sh, then run:
immich-memories models fetch
immich-memories preflight
Fix any reported connection or storage errors before making a film. Model downloads run once; later starts reuse the config volume.
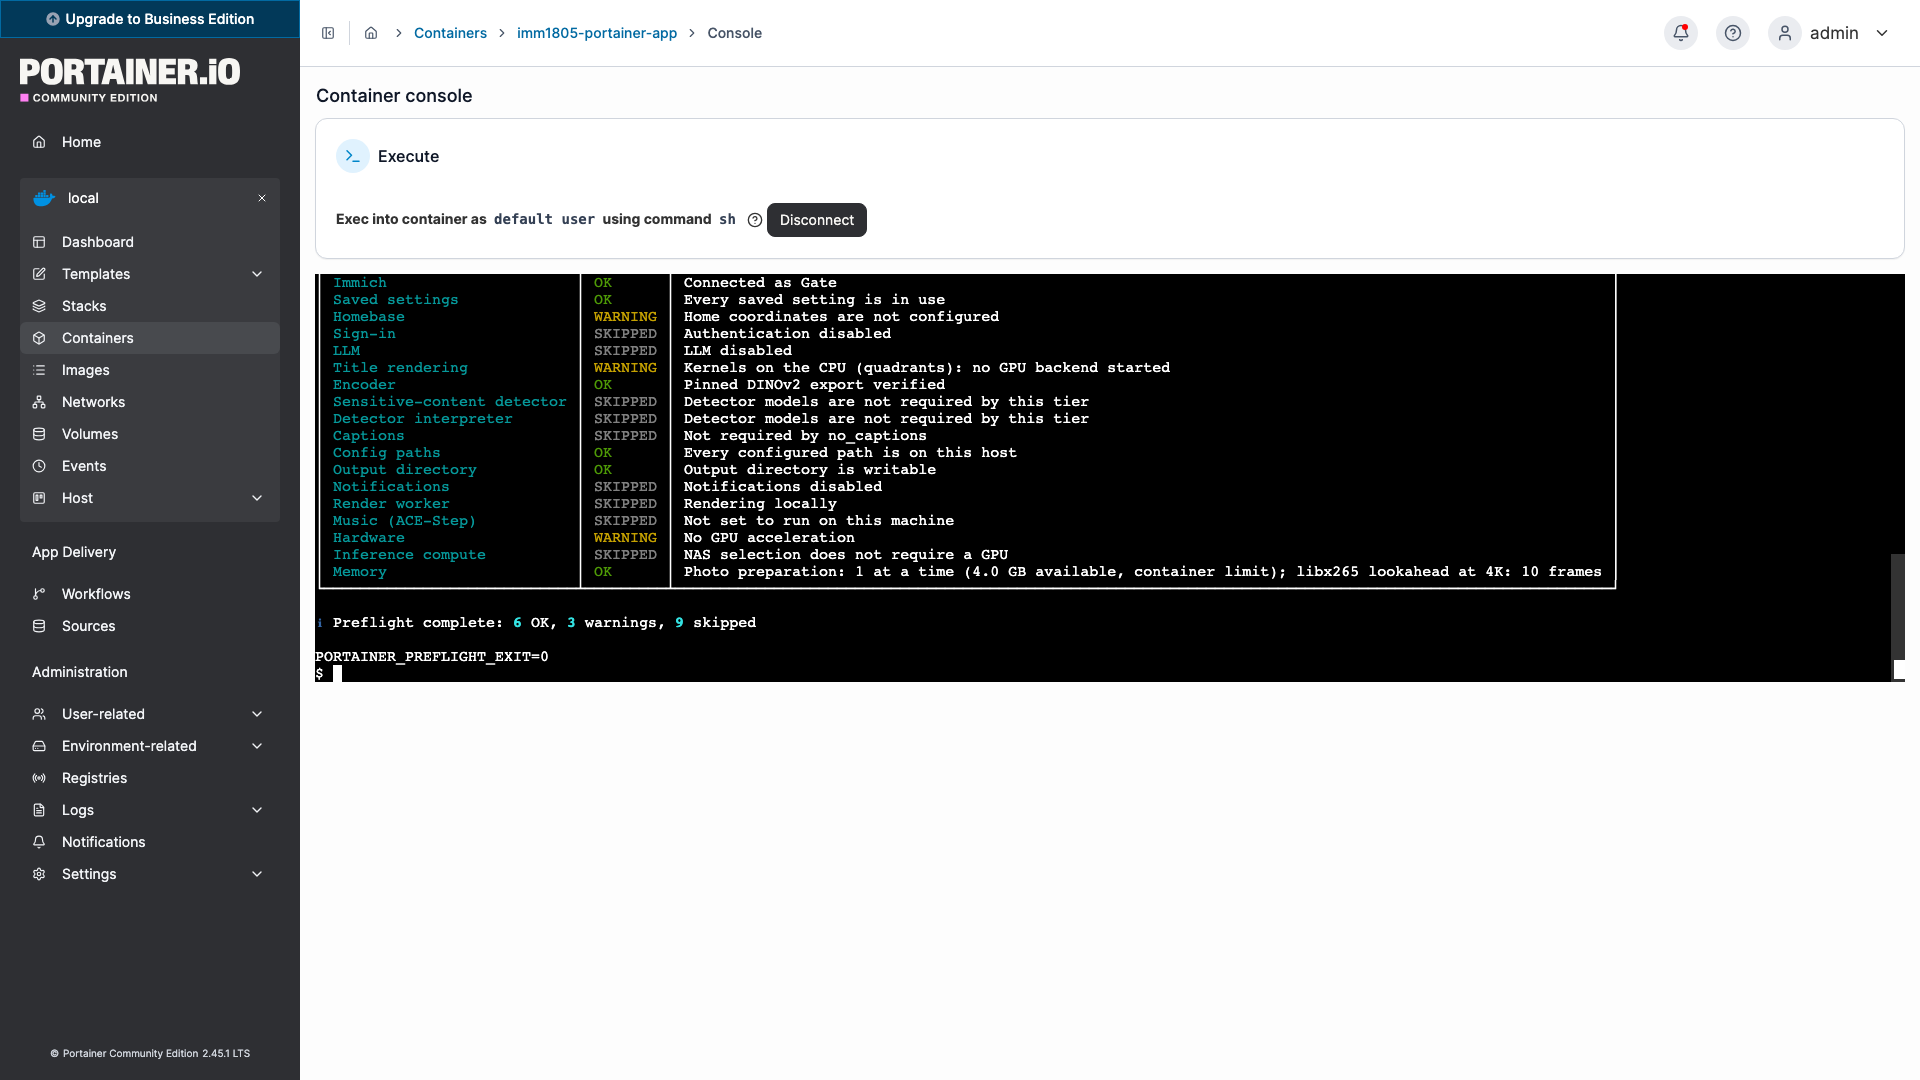
The screenshot names this tier NAS; the app calls it Basic.
4. Open the app
From your computer, tunnel to the Docker host:
Use the Private UI access command generated above; it uses your selected UI port. Replace your-ssh-user@your-host with your NAS login and address.
Open the localhost URL shown by the builder and make your first film. For direct LAN access, enable authentication before changing the port binding. Portainer's own login does not protect the app's port.